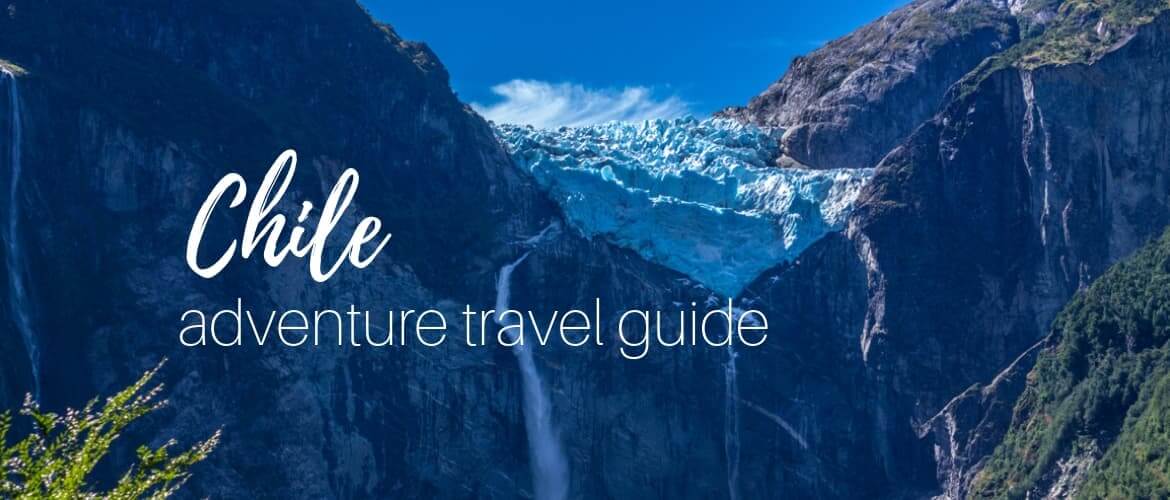
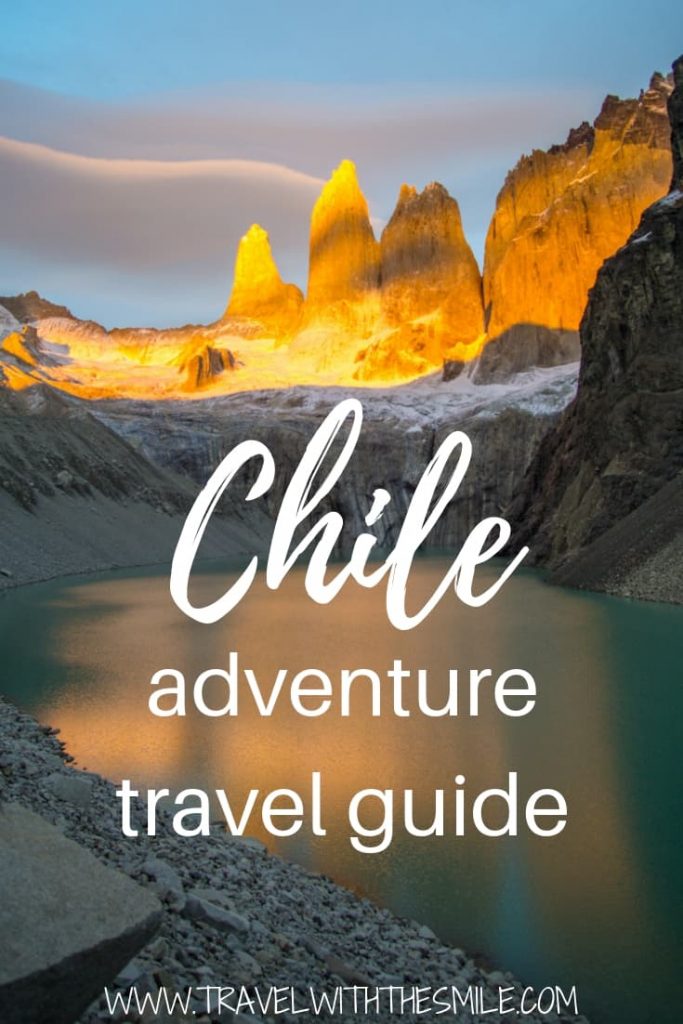
From the driest place on Earth to the endless amount of glaciers, you can find it all while backpacking Chile. This South American country is mostly known for Patagonia, one of the most beautiful mountainous regions in the world. This guide offers everything you should know about Chile and a suggested Chile itinerary for 2 weeks.
Chile (together with Argentina) feels a lot different than the rest of South America. While many countries of Latin America have similar cultural elements such as Mayan & Incan ruins and traditional clothing, Chile is completely different.
I’m pretty sure you’ll feel the same as we did and think you arrived in Europe. Its capital, Santiago, was designed by a French architect so buildings and streets have a European feel. You will find many German towns in Chile and also the best pastries in South America (otherwise found in European bakeries).
After 6 weeks backpacking through the country, we have many tips and insights that we want to share with you and help you plan your adventure.
It is focused on the great outdoors, something you might be already familiar with on our blog. You will find that Chile is an amazing outdoor destination that will exceed your expectations.
Adventure travel guide to backpacking Chile
1. Climate and visas
Chile is a very thin but long country and has many different climates. North of Chile where the Atacama Desert is, the driest place on Earth, is obviously hot and dry. Central Chile, around the capital Santiago, has a warm (Mediterranean) climate. The area this guide is focused on starts in the south, in Puerto Montt.
It’s the beginning of Patagonia with many mountains and fjords. As at any coast, it can get quite rainy and windy. Otherwise, it’s not much different from any other mountainous part in the US or Europe. Although some complain about strong Patagonian winds, we found the winds to be the same as other mountains have.
What you might not realize at first is that Chile is located in the southern hemisphere. Their summer is December – February, and winter is June – August. This makes it a perfect winter getaway!

So when is the best time to visit Chile? I usually suggest spring or autumn due to fewer crowds, fewer issues with booking accommodation and more budget-friendly prices. We’ve visited in April (late autumn) and experienced exactly that plus all four seasons.
You might have different preferences so I suggest reading our detailed post: Best time to visit Patagonia
As far as visas go, it couldn’t be any simpler. There are no tourist visas required, as of December 2018. You will get a visa stamp valid for 90 days on arrival. It applies to most countries (including the US, Canada, EU).
2. Language & culture
If you want to get to know the local people and their culture, or just simply buy a bus ticket without any hassle, learn a bit of Spanish. A good start is learning these basic phrases.
I’ve learned some Spanish with the apps Memrise and Duolingo. They have Spanish classes set up in a unique way, focused on communicating as soon as possible rather than memorizing vocabulary. All it takes is 10 minutes a day and you’ll be able to communicate very fast. Spanish is very easy to learn!
FOR INSPIRATION
50 insane pictures of Chile to inspire your travels

After travelling in Peru and Bolivia, we’ve noticed the Chilean culture is not typically Hispanic. And as I already mentioned, it’s very European so locals are not wearing any traditional colourful clothes. You might rather observe the architecture here or the cultural tradition of Chilean huasos (horsemen similar to North American cowboys).
3. Staying healthy & safe while backpacking Chile
A few weeks before your trip, visit a travel clinic to ask about recommended vaccines based on the current situation in Chile. There are no mandatory vaccines required to enter the country (as opposed to the mandatory yellow fever vaccine in Peru).
Recommended vaccines for Chile include Typhoid, Hepatitis A, and Hepatitis B. Some of them need a longer time to become effective or have to be given in doses to provide protection so the sooner you visit a doctor the better.
The good news is, the mountains in Patagonia (or in our itinerary specifically) are also quite small so you do not need acclimatization when you arrive or special health insurance for high altitudes. You will unlikely go higher than 2,000 meters.

Drinking tap water and from the streams
Unlike most countries of South America, the tap water in Chile is considered safe to drink. Patagonia is also one of the cleanest sources of water but you must know where to drink from in the mountains.
The water in the most popular Torres del Paine National Park was considered safe but since it is so crowded with people and animals (horses and mice); I wouldn’t recommend drinking from its water sources. You might be fine but you might also get very sick, read Michal’s post about getting beaver fever.
Apart from the trek in Torres del Paine, we always used our Lifestraw bottles with a filter to fill up with water wherever we go or drink boiled water on the treks.
Chile is considered the safest country in South America with the lowest rate of violent crimes. That being said, as always, some common rules are good to follow, read our tips here: How to stay safe while traveling
We highly recommend having good travel insurance. Better be safe than sorry. As an example, Michal’s beaver fever was treated in New Zealand where medication is quite expensive. We were glad to have a travel insurance that covered the treatment.
READ MORE
Interesting facts about Chile
4. Transport around the country

Overland travellers usually enter Chile from Peru or more commonly from Bolivia as part of the Salt Flats tour that starts in Bolivia. Most travellers will fly into Santiago’s international airport, Chile’s capital.
-
San Pedro de Atacama entered from Bolivia
When leaving San Pedro de Atacama, you have 2 options. You can either fly from the nearest city Calama (book in advance due to very high prices) or go by long-distance buses.
For anyone not travelling on long-distance buses before, I have very good news for you. Don’t worry if your journey will take 12 hours or longer, Chilean buses are the most comfortable buses we’ve ever travelled in and even more comfortable than planes.
-
Santiago airport
Uber is popular and widely used in Chile and more affordable than a taxi. Just download the app and wait for the car in front of ‘Arrivals’, the fare will cost around 10,000CLP (15USD).
Buses are another option, either Centropuerto or TurBus. Centropuerto buses leave the airport every 10 minutes between 6 am and 11:30 pm and have stops near popular train stations in Santiago. The ticket costs 1,800CLP (2,70USD) and can be purchased on the bus. TurBus have buses leaving the airport every 20 minutes from 5 am to midnight and every hour after midnight, the cost is 1,700CLP (2,60USD).
-
Long-distance buses
Even though you can fly between cities, it’s always worth it to check the buses, especially if you travel on a budget like we were. If your trip is planned in advance, then flights would be the best option. Because bus travel in Chile can be very long, just look at the map.
The most commonly used companies are Pullman and TurBus but there are many more. To compare bus prices and reserve your tickets online, go to this website for most bus companies or to TurBus website (in Spanish only). They offer reclining seats (semi-cama) or fully reclining seats (cama, 180°).
Our experience with long-distance buses
When we were ready to leave San Pedro de Atacama, the flight to Santiago was 200USD in 3 days (the cheapest) or 50USD for a bus the next day. The internet connection in the desert was horrible. We went straight to the bus station and bought bus tickets to Santiago and from there to Puerto Montt, the getaway to Patagonia.
The first trip was 23 hours long, then we spent a day in Santiago and continued on a night bus for 12 more hours to Puerto Montt (it’s faster than the day bus). Before your eyeballs are about to fall out, continue reading what bus travel is all about in Chile.
We bought tickets slightly more expensive and travelled on full reclining seats with attachable mattress, pillow, blanket, a private TV screen with movies, books, games and we were given 3 snacks during the trip. The bus had very comfortable and wide seats with curtains for privacy, air-conditioning and even a toilet.
It was the most luxurious travel we had in South America so no need to fear travelling by bus in Chile.
TIP
If you’re prone to car sickness, I’d recommend getting Sea Bands. They are acupressure wristbands for travel sickness relief. I used them on countless buses and boats and they saved me many times.

-
National flights
As always, flights are more affordable when booked in advance. Before you book the flights to Patagonia, read our comprehensive guide with all the tips and options you have: How to get the cheapest flights to Patagonia
5. Budget & money
Chile is a more expensive country to travel around than its northern neighbours, but not the most expensive one in South America (hello Argentina). What you will get for the price though are very high-quality services.
On average we spent 60USD/day in Chile per person due to buying lots of camping equipment for Patagonia. If you bring your own gear, you should spend around 50 USD per person.

Breakdown of costs is not easy because every traveller has different preferences. We travelled around Chile by buses and spent almost 3 weeks camping in Patagonia (out of 42 total days in Chile), these were our costs during the shoulder season (March – April):
- The average price for a campsite in Patagonia: 5000CLP per person (7,50USD)
- Bed in a dorm room in Santiago: 7,300 CLP (11 USD)
- Private room with the heater in Puerto Natales (the closest town to Torre del Paine NP): 10,000 CLP (15USD)
- Dinner salmon and side in Puerto Natales: 8,000 CLP (12USD)
- Long-distance 12-hours bus from Santiago to Puerto Montt: 44,000CLP (65 USD)
- 5-day W trek in Torres del Paine (including transport, entrance fee, campsites, and food): 93,000CLP (144USD) per person
ATMs are widely popular and paying by card as well. We used our credit cards wherever we could to have the best exchange rate and avoid ATM fees. Totally understandable, but to many travellers’ surprise, everyone accepts Chilean pesos ONLY and no other currency. Withdrawing cash out of your debit card is usually better than exchanging cash, the bank has the best exchange rate.
6. Accommodation
Chile has a huge range of accommodation options everywhere we’ve visited. San Pedro de Atacama, Santiago, Puerto Montt, Puerto Natales, small towns in Patagonia all the way down to Puerto Williams. In Patagonia, we used mostly campsites which were usually around 5,000 CLP (7,50 USD). We stayed in hostels when it was too cold or we were in bigger cities.
We never booked a campsite in advance but when we booked hostels, we used either Hostelworld or Booking website. When you travel in the shoulder season, you might even negotiate a better price as a walk-in.
Read more tips in our post about how to find cheap accommodation.

Hostels in Chile
San Pedro de Atacama is very hot, dusty and incredibly touristy. The cheapest hostel we could find was a bed in 6 dorm room for 10,000 CLP (15 USD) and it was crammed with beds and no lockers.
The capital Santiago has many colonial–style hostels in huge restored old mansions with high ceilings. They have very spacious rooms, many common areas and many of them have an outside terrace with a pool. We’ve stayed at Casa Roja in a dorm room for 7,300 CLP (11 USD) per person.
In Puerto Montt, we’ve stayed at a local Hospedaje Polz (Bed & breakfast) in a private room for 20,000 CLP (30 USD) including breakfast which we didn’t book beforehand. A local man working at a bus station offered to take us there right after we left the bus. Lucky for us, it was close to the bus station and also the price online was the same as he offered.
Puerto Natales, from which you visit Torres del Paine National Park, has many great options. We’ve stayed at the W circuit hostel in a private room for 20,000 CLP (30 USD). It’s a little cozy place with a very well-equipped kitchen and accommodating staff.

Puerto Williams, the southernmost city in the world, is very tiny and has only a few options. We’ve stayed in hostel Dientes for 12,000 CLP (18 USD) per person including breakfast. Although it was a dorm room, we had it all to ourselves – perks of travelling in the shoulder season.
7. Chilean food
National food is not something we look for intentionally. We usually try something that’s new for us that locals recommend.
A Chilean guy who worked as a ranger in a Queulat National Park invited us for dinner. We drank Piscola with his friends, which is just a mix of Pisco and Coke. Pisco is an alcoholic drink which some argue is from Peru and some that it’s from Chile. Honestly, we haven’t looked into it and happily drank with locals in both Peru and Chile.
Our new friend drank a little too much and I was left alone to prepare Sopaipillas, deep-fried pastries made from pumpkin. I’m sure it’s a great dish if know how to prepare it or buy it in food stalls.
We accidentally stumbled upon delicious donuts at the gas station in the middle of the rural part of Patagonia when hitchhiking on Carretera Austral. They reminded us of Slovak donuts we used to eat so often as kids.
In Patagonia, you will see a lot of Calafate berries growing in the bushes. They are delicious fresh, as a jam or a liquor.
The legend says that anyone who eats Calafate berries will return to Patagonia.
And now I need to mention the most important food – the buns, or any fresh pastry. Thanks to German immigrants, the pastry they make in all of Patagonia was the best we’ve ever had in South America.
8. Useful books for backpacking Chile
- Chile travel guide including Easter Island & Patagonia – countrywide guidebook, a favourite book for every traveller (digital version also available)
- Adventure map of Chile – a very detailed map, ideal for planning
- Latin American Spanish in your pocket – we also carried a small book with key phrases and words for communicating in Spanish. The Spanish app we downloaded wasn’t always useful when trying to communicate.
- Carretera Austral guide: one of the world’s most scenic road trips – Carretera Austral is a remote part of Chilean Patagonia, ending in Villa O’Higgins, and as of September 2018 also included in the Route of Parks (a 2,800km long scenic trail across 17 national parks)

9. Movies & documentaries to see before backpacking Chile
I always like to read a book or watch a movie about a country I’m going to visit. It gives you more insight into the culture and you’ll be even more excited about your trip.
- Machuca – this movie captures authentically a story behind the Chilean dictatorship under General Pinochet
- No – an Oscar-nominated movie is a story of a marketing campaign that helped to end the dictatorship in Chile
- The Motorcycle Diaries – both a book and a movie tell a wonderful story of two young boys as they travel through South America and open their eyes to the world we live in. This will truly spark your travel wanderlust.
- Unbounded – a documentary about 4 travellers as they follow the ‘Greater Patagonian Trail’
- 180° South – a documentary that follows an adventurer as he retraces the journey of his heroes to Patagonia
READ FOR INSPIRATION
30 Best outdoor movies and adventure documentaries

Chile itinerary 2 weeks for first-timers
This suggested itinerary is for adventure seekers. It will take you through breathtaking & dramatic landscapes of Patagonia all the way down to the remote part known as the Land of Fire. You will see countless mountain peaks, glaciers, wildlife and explore life and mountains in the southernmost city in the world.
Day 1: Santiago
All international flights fly to Santiago, I’ve mentioned above in section 4 ‘Transport around the country’ how you can get from the airport to the city.
Santiago is still quite far from Patagonia. You would need to fly to Puerto Natales (or alternatively to Punta Arenas). Book your flight as soon as you can, ideally on the same day or the next one. Depending on the day when you can make it to Puerto Natales, either explore Santiago the first day or at the end of your trip.

Day 2: Puerto Natales
The airport in Puerto Natales only operates during the high season. If you’re planning to come outside of the December-February months, you will need to fly to Punta Arenas.
There is a direct bus from Punta Arenas airport to Puerto Natales, it departs 7x a day, costs 10 USD one way and takes about 3 hours. You can purchase the ticket online on their website.
Puerto Natales is the main hub for all the travellers visiting Torres del Paine National Park. You can find here a big supermarket with all the food you’ll need for your trek, many outdoor shops if you wish to buy something and rental places for any gear you might need but didn’t bring with you.

If you’re new to trekking, I’d recommend visiting the Erratic rock hostel for their daily seminar at 3 pm. They can advise you on the different options you can trek, have a rental shop and also sell bus tickets to the entrance of Torres del Paine National Park.
After you bought all the food for the trek, booked campsites (more on this below) and have all the gear, you can either go for a walk by the ocean or visit the nearby Milodon Caves (reachable either by car, taxi or bike).
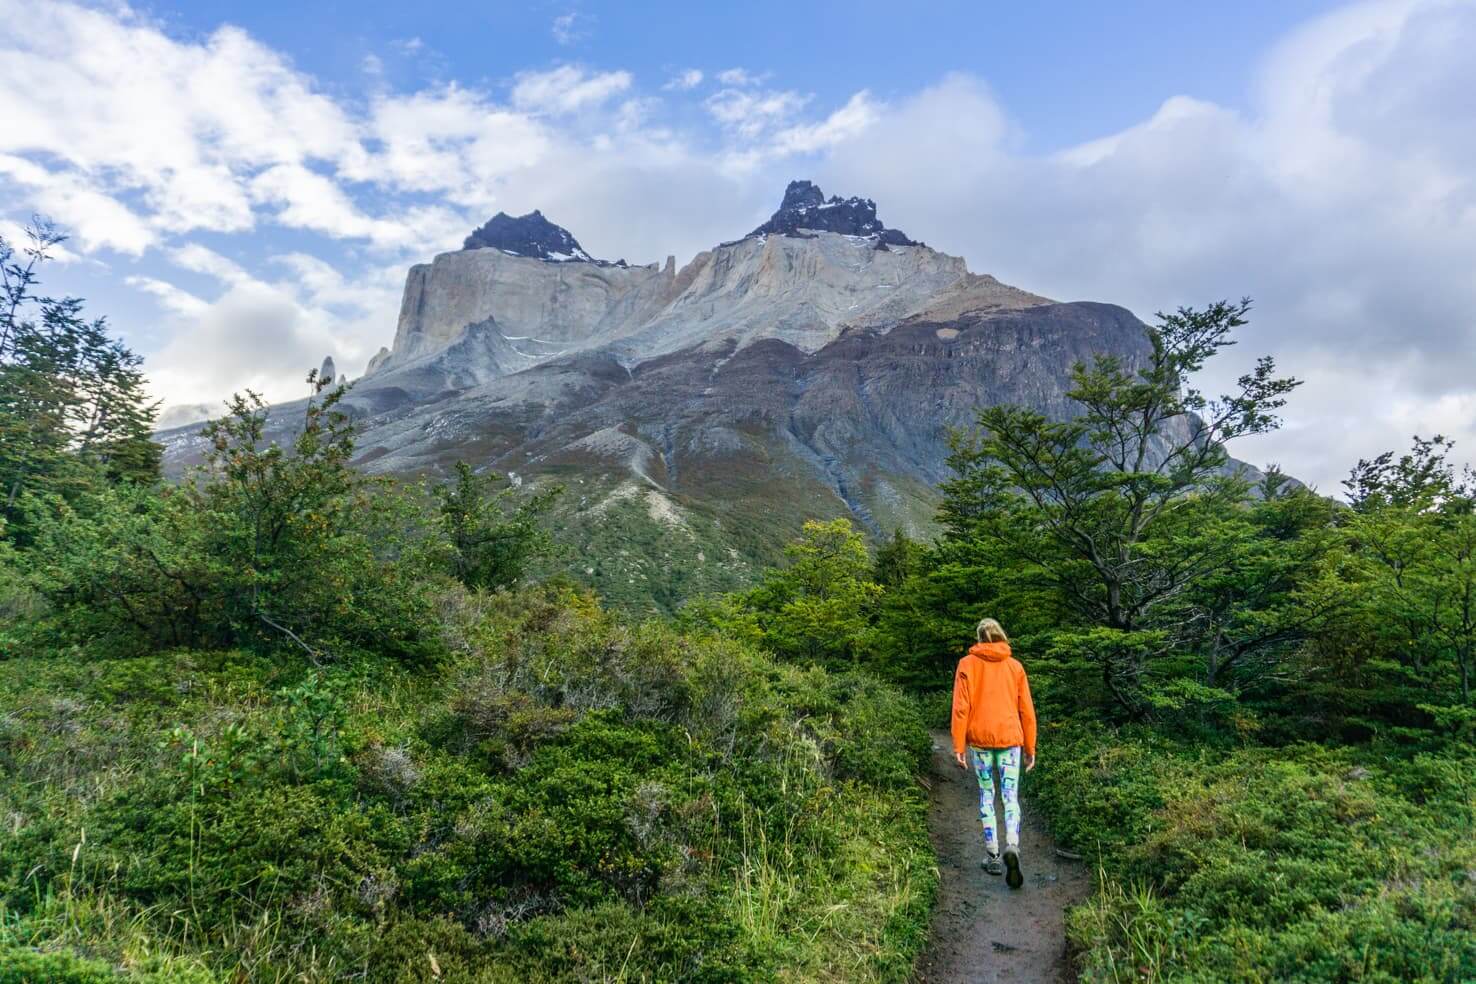
Day 3 – 7: W trek in Torres del Paine (or day hikes)
This is probably the most popular trek in South America, and reasonably so, as you’ll see yourself. During only 5 days, you will trek through several valleys in one of the most beautiful places on Earth.
If you don’t want to trek, you can rent a car, explore the park and go day hiking. But let me tell you – you will be missing out. I’m confident everybody can finish the trek (as long as you live a somewhat active lifestyle).
The famous W trek in Torres del Paine covers 80 km through the national park with slight elevation. The trail is so well-trodden that you don’t need a map or a guide. It is not a remote backcountry, there are refugios (huts) along the way where you can stay and not worry about carrying any camping gear.

You can also pre-book a tent in the campsites which will be already set up for you; you can pre-book a night in refugios with a full board and carry only a daypack, or you can carry your camping gear, cook all your meals and cut on expenses. There are options for every fitness level.
The more fit you are and able to carry your gear, the more affordable this trek will be for you.
Michal and I carried all our gear and cooked food and were able to spend only 144 USD per person for the whole trek, transport, campsites, and food included. We’ve taken advantage of 2 paid campsites and 2 free campsites. For comparison, the guided trek costs around 1,500 USD.
The usual (and our) W trek itinerary looks like this:
Day 1: Grey Glacier
Bus transport to Torres del Paine National Park (around 2 hours), then another 30 minutes to Lake Pehoe shore and a boat will take you across the lake where the W trek starts.
You’ll start trekking around noon to the Grey Glacier ranger station/campsite. It’s along the Grey Lakeshore with a view of the glacier and is very scenic, around 11km. It’s worth it to leave your backpack in the tent and continue another few kilometres to the hanging bridge near the Grey Glacier.

Day 2: Italiano camping
Trekking to Italiano ranger station. You will backtrack the same route as you trekked the day before. Then continue another 7,5 km to the Italiano ranger station (free basic campsite). It’s quite a tough day as you’ll be still carrying a lot of food but the next day will make up for it.
Day 3: Frances Valley
You will pack your stuff and leave your backpack in the campsite as you will be trekking into the Frances Valley (the middle part of the letter ‘W’). This part of the trail is quite easy and you will feel weightless without your heavy backpack.
Even though it was raining when we went, the mountain peaks all around us showed us the beauty of Torres del Paine.

Once you make it down to the campsite, you’ll take your backpack and continue just a little bit further to Frances campsite (total of 12km for the day). You’re only allowed to stay 1 night at free campsites and Frances has nice facilities with hot showers and a restaurant.
Day 4: Torres camping
This is the longest day where you will trek 24km but most of the trail is flat. Close to the end you will be trekking uphill, pass Chileno Lodge and continue to the Torres camping zone (another free campsite).
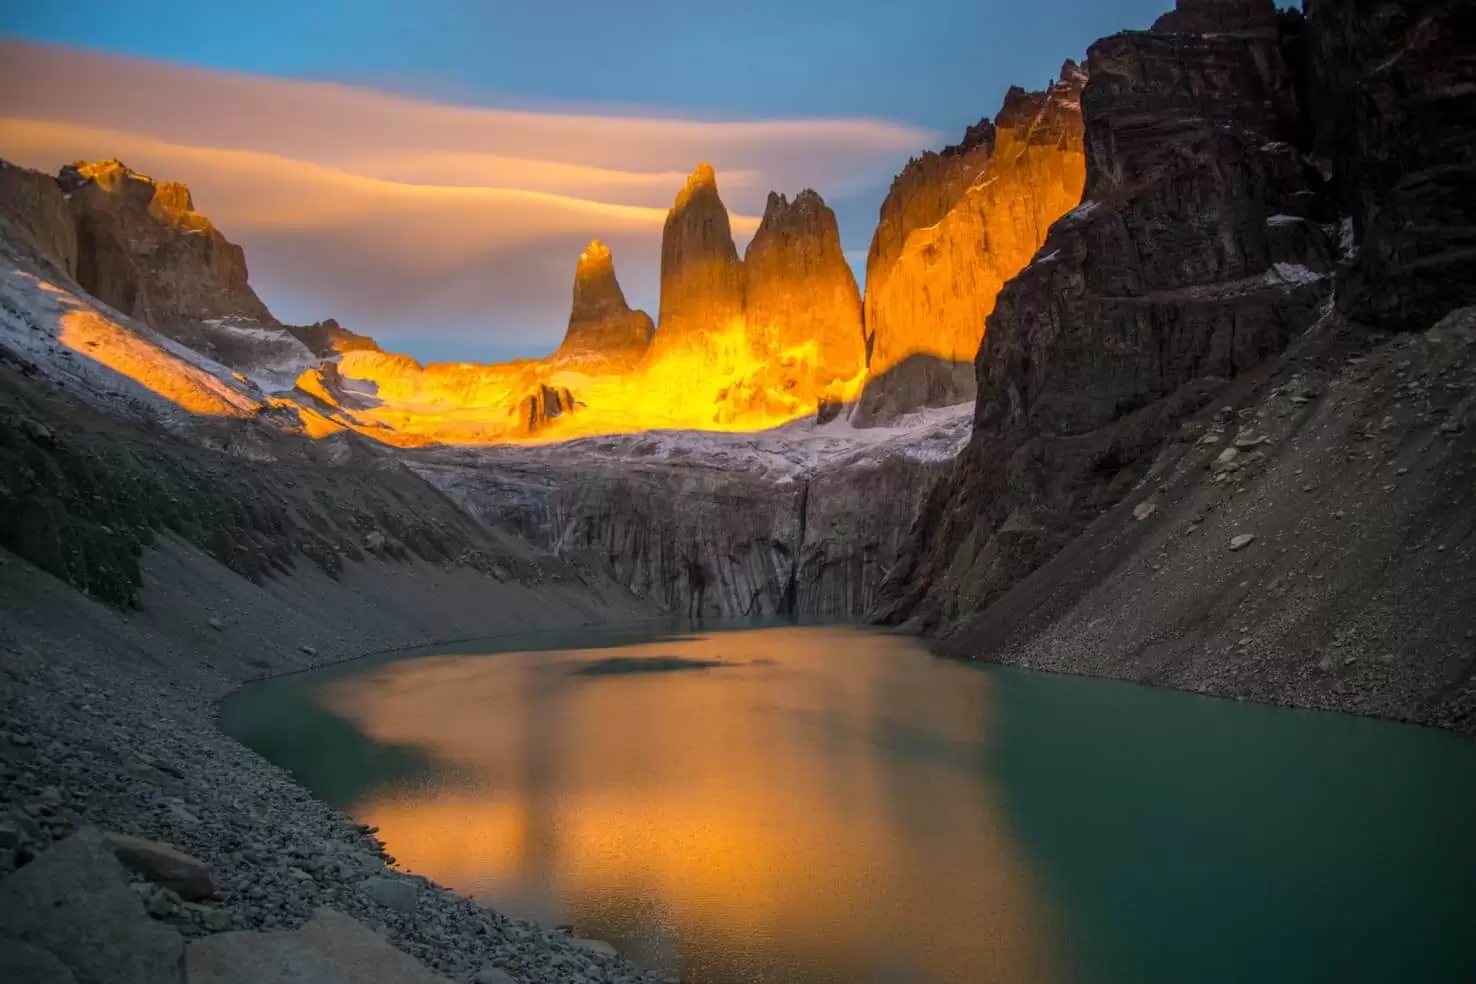
Day 5: Sunrise at Torres
It will be a grand finish and only 11km trekking. You will wake up before the sunrise (we woke up at 6:30 at the end of April) and after a quick breakfast start walking uphill for about 45 minutes to see the famous Towers. The most beautiful part of the trek – it marked the end and we witnessed one of the most memorable sunrises ever.
After enjoying the moments to the fullest, you will go back to camp, pack all your gear and head down where a shuttle bus will be waiting for you around 1 pm. Another bus will then take you back to Puerto Natales.

It will be an unforgettable experience you will cherish for the rest of your life, believe me.
I will not go into further details about the trek here because there is a lot to talk about, many rules to follow and a bit complicated booking process for the campsites.
All the details you need about the W trek, including:
- the breakdown of the cost
- weather & usual trail conditions
- camping gear you need
- explanation of the booking process for the campsites and different options
- cost and other details about refugios
- and our own experience
You can find in our comprehensive post (click below):

After the trek, I recommend going to El Bote restaurant where they make the best salmon with baked potatoes.
Day 8: Punta Arenas
I imagine you will be tired after the trek. If you didn’t have a chance to go for a massage after the trek, I suggest you go. You won’t believe how a short massage can do wonders and relief your sore body.

Then it’s time to move on to Punta Arenas. You can either book your tickets in the booth at the bus station (where you will get off after the trek), or book them online here. The journey takes around 3 hours so you’ll have plenty of time to relax.
Book accommodation close to the meeting point for your penguin tour. It’s usually downtown where restaurants and supermarkets are also close by.
Punta Arenas is not a very exciting city to explore but it’s a getaway to Southern Patagonia.
Day 9: Porvenir for penguins
It’s time to see some wildlife. And not just any wildlife, you will see king penguins!
Most people visit Isla Magdalena to see small penguins which migrate from Brazil and Peru to reproduce here for about 3 months a year during summer. In Pingüino Rey Park near Porvenir, you can see the biggest penguins in the world all year round. They are unique species that only live in Antarctica and Tierra del Fuego.

From Punta Arenas, you can either rent a car and drive by yourself or book a tour online.
- Self-drive – there are 2 different options for how to get there and both of them require a ferry ride as well. The penguin park has a daily limit of visitors so make sure to book your tickets in advance. The Pingüino Rey Park is open year-round Tuesday to Sunday and the entrance fee is 12,000 CLP (18 USD). For more info, check out their website.
- Tour – includes transport and a guide but not the entrance fee. It costs 55,000 CLP (82USD) per person.
Unlucky for us, we’ve visited Punta Arenas during public holidays so we didn’t see them (but made up for it later in New Zealand).
Don’t miss a chance of seeing these beautiful creatures!
Day 10 – 12: Puerto Williams

From Punta Arenas, you can fly directly to Puerto Williams. Ever heard of it? I don’t blame you, not many people did. Puerto Williams is the southernmost city in the world and part of Tierra Fuego, or Land of Fire.
We’ve learned at school that it’s Ushuaia in Argentina but this is not true anymore. Although Puerto Williams got an exception to call itself a city because it’s very small, it’s located around 12km south of Ushuaia. It’s not only the end of the world; it also feels like the end of the world.
The plane between Puerto Williams and Punta Arenas flies Monday to Saturday, check this schedule. Another option is a ferry and although the 33-hour ride was very enjoyable, I understand that most people don’t have the time for this.

The landscape is very rugged, most of the year has harsh windy conditions but the community living in Puerto Williams is small and welcoming. You can explore the Yaghan campsites, an indigenous tribe of the area and even buy a handcraft from the last Yaghan descendant.
There are several hikes in the area, either to the waterfalls or to Cerro La Bandera. It’s a one-day hike on the hill above the city from which you see across the Beagle Channel to Argentina.

It’s a unique experience to walk the streets of the southernmost city in the world and truly off the beaten path place.
On day 12, you will fly back to Punta Arenas, the plane leaves at 11:30 am and then catch a flight to Santiago.
Day 13 – 14: Santiago or Valparaiso
The ideal time to explore a bit of Santiago is at the end of your trip. No matter the unpredictable weather conditions you encounter in Patagonia or in Puerto Williams, Santiago is usually sunny and warm.
Downtown is alive with street artists and cultural performances, or you can check out a few of the famous markets with traditional Chilean handicrafts.

If you’re not a big city fan, you can hit the beach in Valparaiso, a colourful city on Chile’s coast, just 2 hours by bus from Santiago.
*In the spirit of full disclosure: Some links in this post are affiliate links, which means that if you purchase through them, we receive a small commission at no extra cost to you. We appreciate your support!
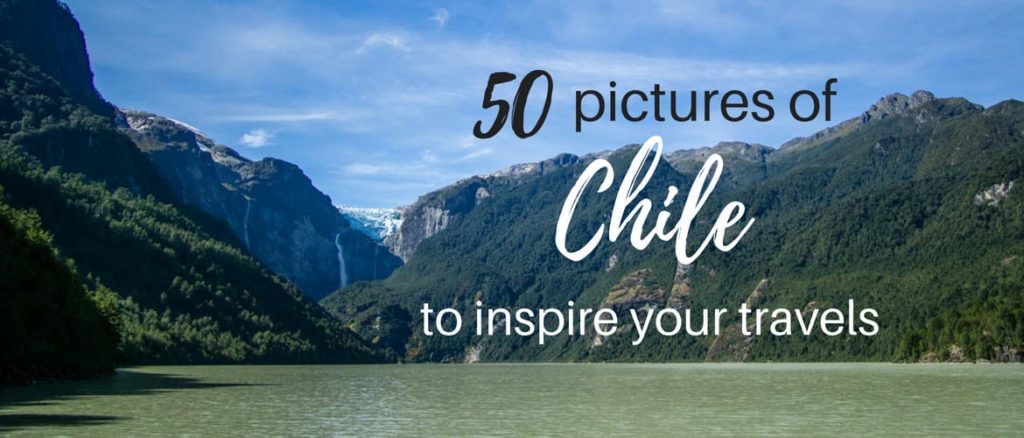
I hope you will your Chilean trip! For more inspiration, check out our photo essay of the best pictures of Chile:
Read our travel tips & guides:
19 smart travel tips for planning your next trip
Are you ready to visit Chile? Let us know if you have any questions in the comments below.
Spread the word! PIN this to your Pinterest board.


Hi! Thank you for your detailed post—this makes me really excited to visit Chile!
My boyfriend and I are planning a two week trip to Chile in the beginning of November, and our number one goal is to trek the W. I have two questions:
1) I have a bad back so can’t carry my own gear—are there companies that can porter our things from one campsite/Refugio to the next? I don’t want to have to go with a guided tour but am afraid that’s the only option since I can only carry a daypack.
2) Are we able to book things once we arrive? What if it is a guided tour? I know most things are cheaper booking local instead of from the States.
Thank you!!
Hi Aviva,
I haven’t heard of a company with porters but what you can do is sleep in refugios (which includes meals) and only carry your day pack. Alternatively you can also book a tent which will be already set up for you when you arrive at the campground (but this is not possible in every single campground).
With a guided tour, you would need to carry all your camping stuff anyway. There really is no need for a guide, the path for the W trek is well troden and you will be provided with a detailed map.
As for the bookings, all campgrounds and refugios cost the same no matter where you book them from. If you’d like to stay in refugios, I’d suggest booking in advance. This trek is extremely popular.
Hope you will have fun!
I only express myself in the Comment section whenever I love and appreciate an article so so much.
You have made it so easy to read and understand, am sure your not like those copy and paste guys that care only about traffic.
It’s nice visiting and am adding your blog to my home screen. Keep it up.
Cheers
Thank you so much for writing this guide. For the next couple of years, I am planning to focus on South and Central America – mostly Patagonia, Amazon, Peru, Costa Rica, and Belize. This is going to help me so much.
Hi George, I saw your comment just now and hope you’re enjoying your trip.
Super info, vse si proctu a v breznu v Chile. Odkud jste, pratele? 🙂
Parada, tak si to uzi! Sme z Trencina a byvame v Kanade.
This itinerary looks amazing! I’m planning a trip to Chile soon, and the adventure suggestions are exactly what I’m looking for. I can’t wait to explore Torres del Paine and experience the local culture in Santiago. Thanks for the helpful tips!
Wow, this itinerary is fantastic! I’m especially excited about the hiking tips for Torres del Paine and the recommendations for local food in Santiago. I’ve always wanted to explore Patagonia, and this guide has given me the inspiration I needed to finally plan my trip. Thank you for sharing such valuable insights!
This itinerary is perfect for anyone looking to explore the diverse landscapes of Chile! I love the mix of adventure and culture you included. I can’t wait to try out some of these hiking trails and sample the local cuisine. Thank you for sharing such detailed tips!
This itinerary is fantastic! I’m especially excited about the recommendations for hiking in Torres del Paine and exploring the vibrant culture in Valparaíso. The details on budget tips and must-try local foods are super helpful. Can’t wait to start planning my own adventure in Chile!
What an amazing itinerary! I love how you’ve covered both the must-see spots and the hidden gems in Chile. The tips for backpacking are super helpful, especially the recommendations for off-the-beaten-path adventures. Can’t wait to start planning my trip!
What an amazing itinerary! I love how you highlighted both the must-see locations and the hidden gems. The tips for backpacking are super helpful, especially the advice on transportation and budget-friendly options. I can’t wait to use this guide for my upcoming trip to Chile!