When we moved from Europe to Canada and saw how big North American minivans are compared to European cousins, we knew we will buy one and use it as a weekend mobile bed/hotel.
Once we’ve got our Dodge Grand Caravan and found out how easy you can remove seats and have flat base for our inflatable mattress, we didn’t have to do much more. There was enough room inside to store our mountain bikes while sleeping on the mattress. The car floor was almost perfectly flat that besides removing chairs we didn’t do any alteration. And that’s how we traveled in Canada for three years.

This is what we used to do:
The day before our trip we removed two back rows of seats, loaded our bikes inside and set off. We slept comfortably on an inflatable mattress. The only drawback was that we had to shuffle all things every morning and every evening to set up a bed. This worked very well for the two of us.
But when we came to New Zealand during our trip around the world, we wanted to travel around in a campervan. It is the most budget friendly option in New Zealand and ideal for long term travelers. Plus, we had two more people coming to visit us in New Zealand.
We aimed to buy a minivan instead of a cargo van for several reasons:
- comfortable seats
- easy to drive
- cheap(er) maintenance
In New Zealand, we were lucky to find a minivan that we have experience with, especially when the car that we bought was 18 years old. We had Dodge Grand Caravan in Canada and bought Chrysler Grand Voyager 2000 in New Zealand, which is basically the same car.
Generally, used cars in New Zealand are very old and very expensive. Minivans cost between 4,000-5,000 NZD and our minivan cost 2,000 NZD. It was the single best choice we could get for the money.
UPDATE
In 2019, we started Smile Campervans, a campervan rental company for travelers in the Canadian Rockies. Check out our website to see how we upgraded the minivan set up (couch & kitchen included!).
How to convert your minivan into a campervan
Firstly, think about your expectations.
Our expectation from the car was to fit 4 people. We also had to fit inside a bed for 2 people and two mountain bikes. We had to build a bed that is easily foldable and also has storage underneath. Our minivan didn’t have a tow bar so had to buy bike racks on the roof and stored our camping gear and all luggage inside. We didn’t need a big kitchen for cooking and only used a small camping stove to occasionally boil some water.
Our budget for campervan conversion
Our budget was 300 NZD (220USD). We bought some plywood, lumber, mattress, screws, and screens to protect us from mosquitos. (note: prices in NZD are much higher, you would pay for the same conversion less than 150USD in North America)
Budget breakdown:
- Brand new mattress – 150 NZD
- Pieces of plywood – 26 NZD
- Screws and bolts – 25 NZD
- Mosquito screen – 13 NZD
Tools were borrowed from our family friend but can be rented from hardware stores.
We used our sleeping bags and pillows so we didn’t spend any more money. At the end, we only spent 214 NZD in total.
Size of the bed
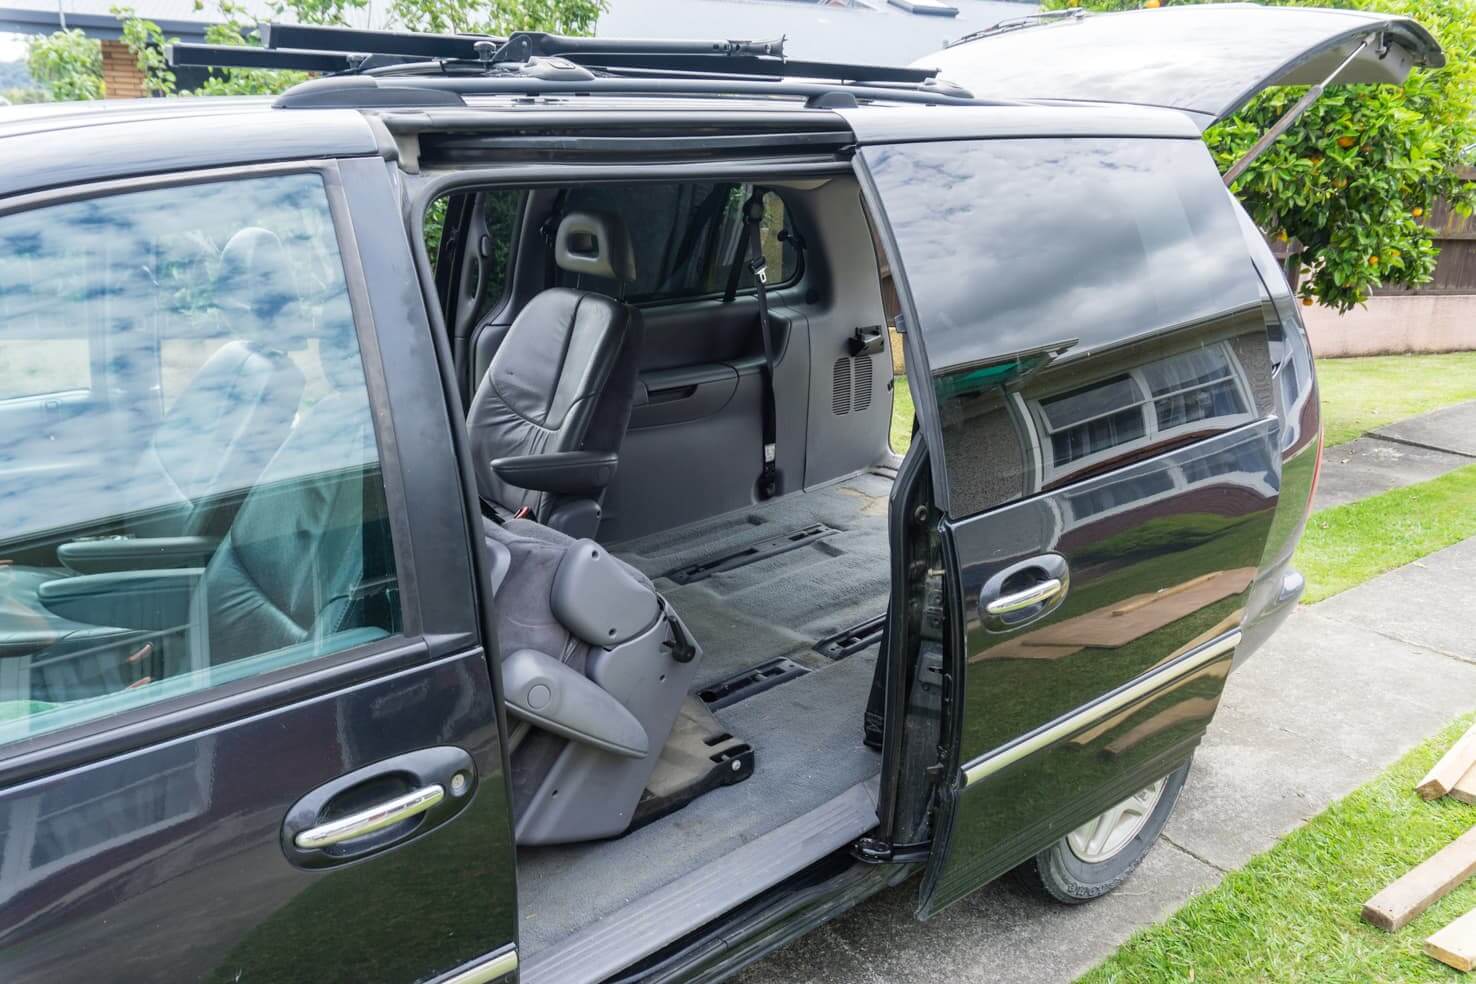
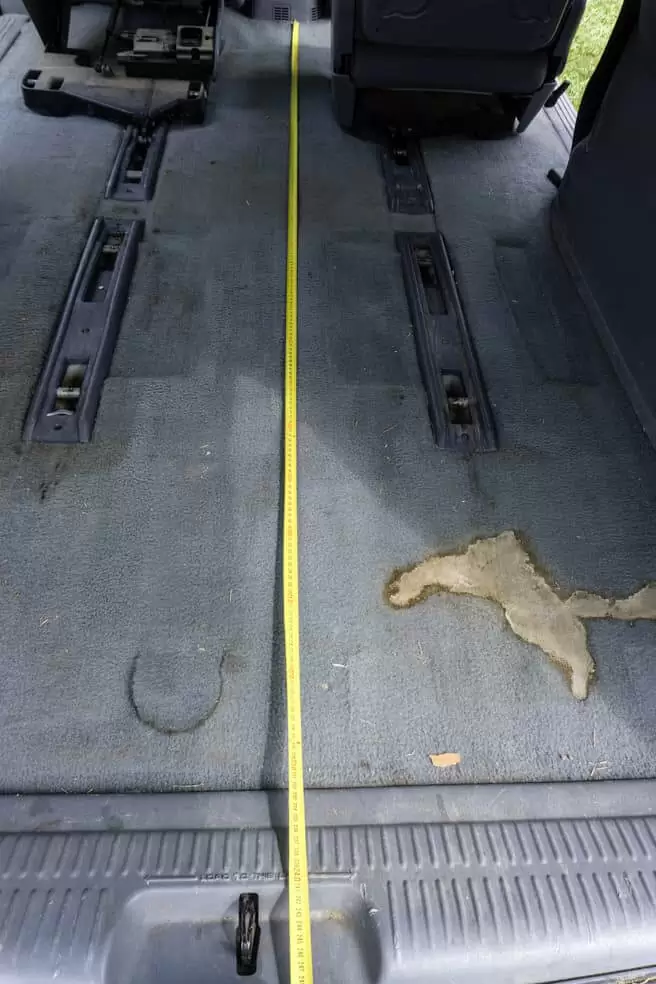
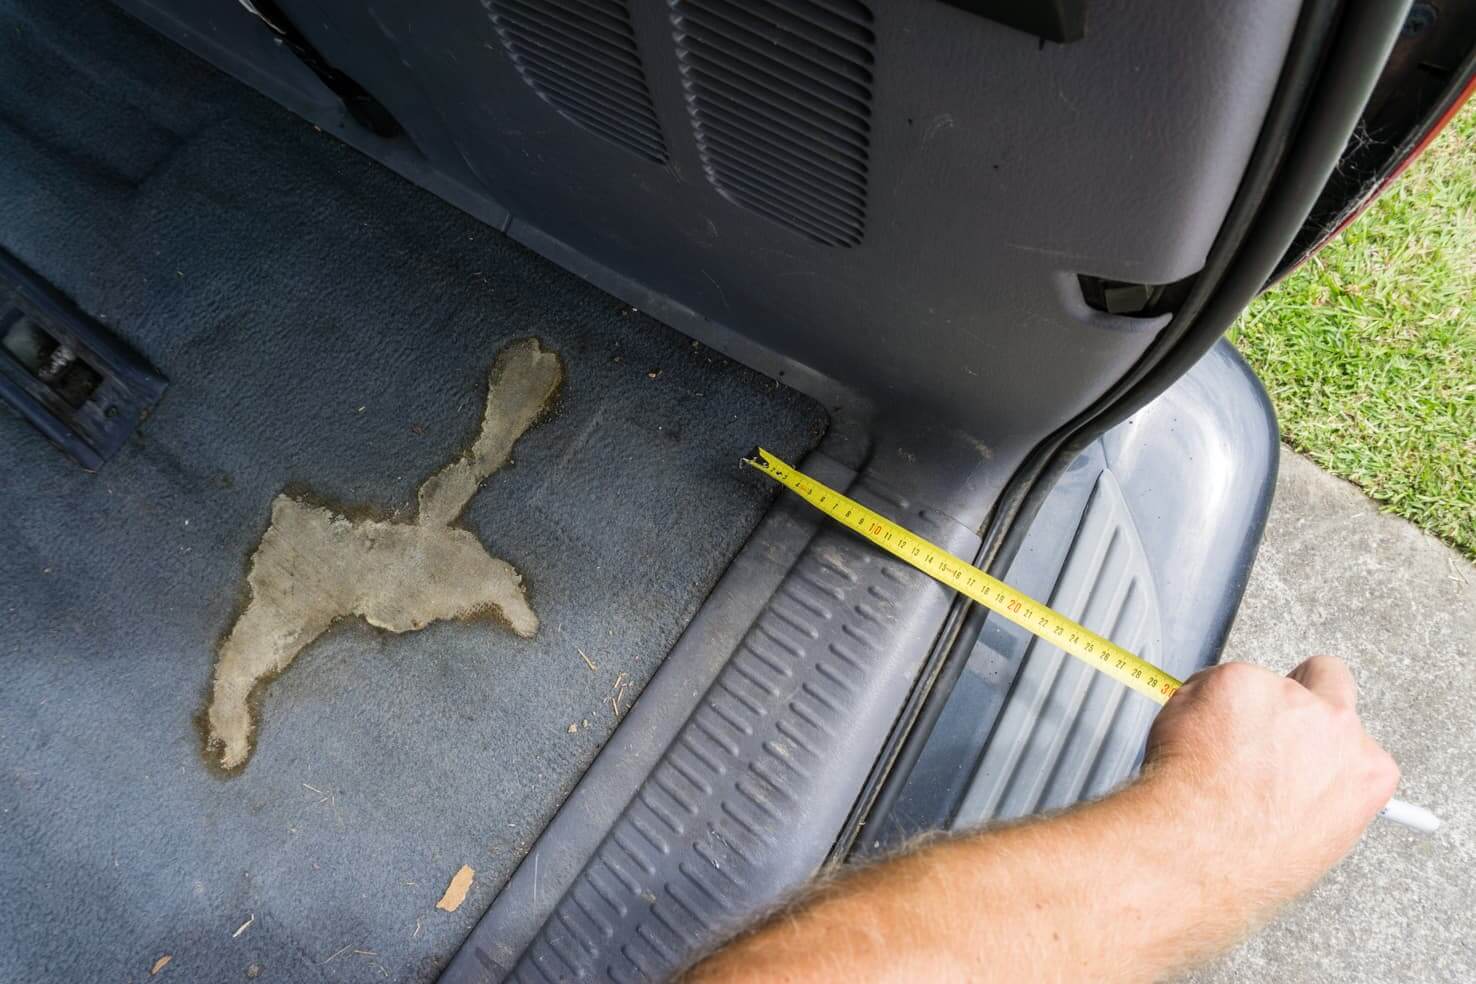
First measure the inside dimensions of your car. Grand Caravans and Grand Voyagers have the widest and longest inside floor dimensions. Bigger cars are only cargo vans. Grand Caravans and Grand Voyagers are about 8’ long (2.40 m) and 4’2” wide (1.27 m). The rear door frame is about 3’4” tall (1.02 m) but inner height is even bigger by another 3” or 8 cm.


How to build foldable bed in Dodge Grand Caravan/Chrysler Grand Voyager
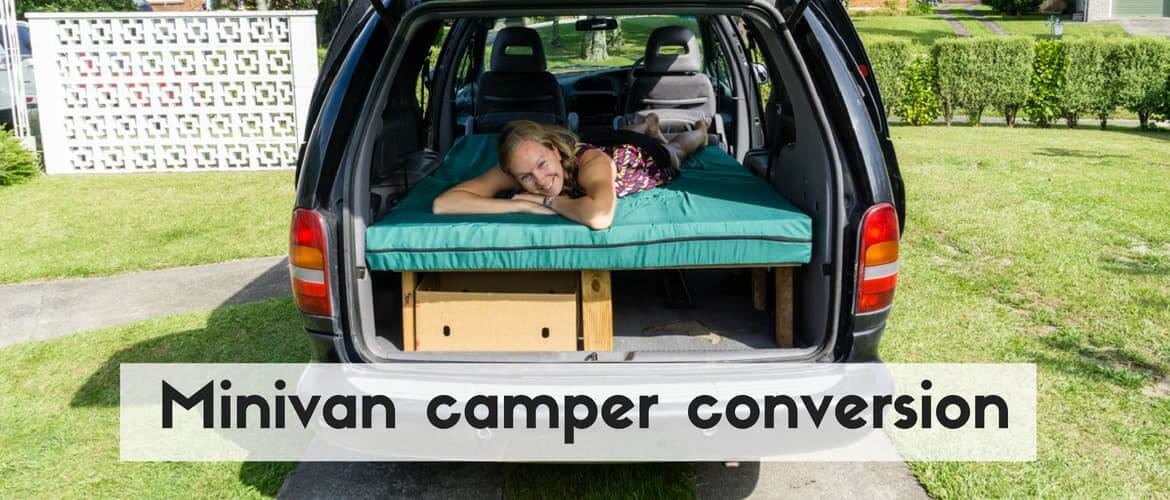
We didn’t find any mattress that would perfectly fit inside. The closest one that fits is full-size mattress 53” x 75” (1.35 m x 1.90 m). When we built our bed we wanted to have the most space for our comfortable sleep. The limit for us was the narrowest point around wheels. We ended up with 4’ (1.22m) wide plywood which was perfectly sufficient for us. We had about one-inch gap on either side of the bed frame but the mattress would cover those holes.
Our other limitation how to build the bed was that we wanted to be able to sit on the bed without hitting our heads on the roof. We are quite tall persons – I’m 6’1” (1.86m) and Maya is 5’9” (1.75m). The maximum height of the bed from the floor was only 1’ (30 cm). Which would limit our storage space but gave us comfort that we wanted.
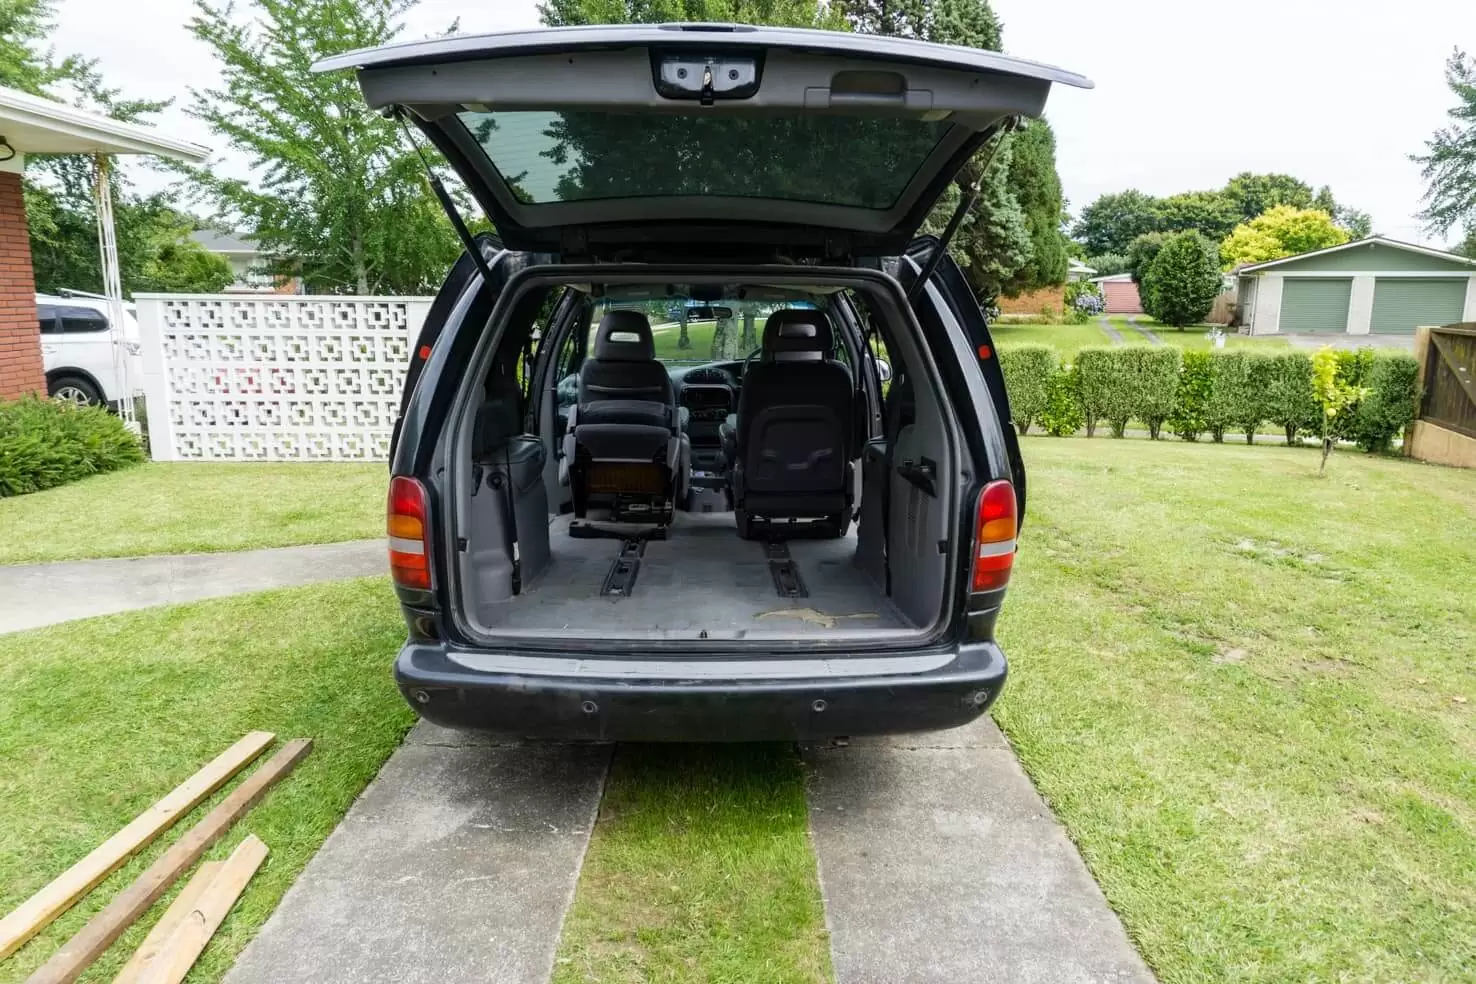
The last problem for us was that two passengers have to sit in the back. That required our bed to be foldable/slideable with minimum effort. In the older version of Grand Caravan that we had, we couldn’t stow seats in the floor, so the bed frame had to fit to the level of fully folded chairs.
Let’s build the bed
We ended up with fixed bed frame of 4’ x 4’ of ¾” thick plywood. I built it from two half size pieces which I bought from Salvation Army store. I used nine legs which I fixed with two 3” screws. Timber I used was recycled 2” x 4” in 1’ (30 cm) lengths (8 pieces). And one piece of 4” x 4”for the front center leg for better support (if you are using only one piece of plywood 2×4 is sufficient). As you can see on the pictures, rear legs are not on the edge of plywood but instead about 5 inches inside due to the plastic edge of the trunk.
-

- Left legs are 12 cm (5″) from the edge of the plywood. Right legs (closer to my feet) will be screwed halfway on the plywood. 2×4 next to my right foot was replaced by 4×4 for better support
-
- You can see 12 cm difference between where the leg would be fitted and edge of the loading line
Sliding piece of bed frame was 2’ x 4’ of ¾” thick plywood with legs only in the front part. Rear legs are shared with the fixed main bed frame. I drilled holes through two legs on the sides to fit pin made from bolts as I wasn’t able to find any wooden pins at the time. And I also found them more rigid compared to wooden ones. (I forgot to take picture of actual sliding pieces, but idea similar idea can be found here.)
-

- First I taped slideable piece (left) to fixed piece. Then I drilled holes right through plywood and legs.
-

- I used same size drill bit as the threaded bolt. Then increased size of bit to find perfect snug fit for bolt. I didn’t use any glue for bolt.
-

- You can see 4×4 in the middle
-

- Due to the chair base I couldn’t put legs all the way in front. With newer version of folding chairs there is enough room for bed legs to be at the front edge of the plywood
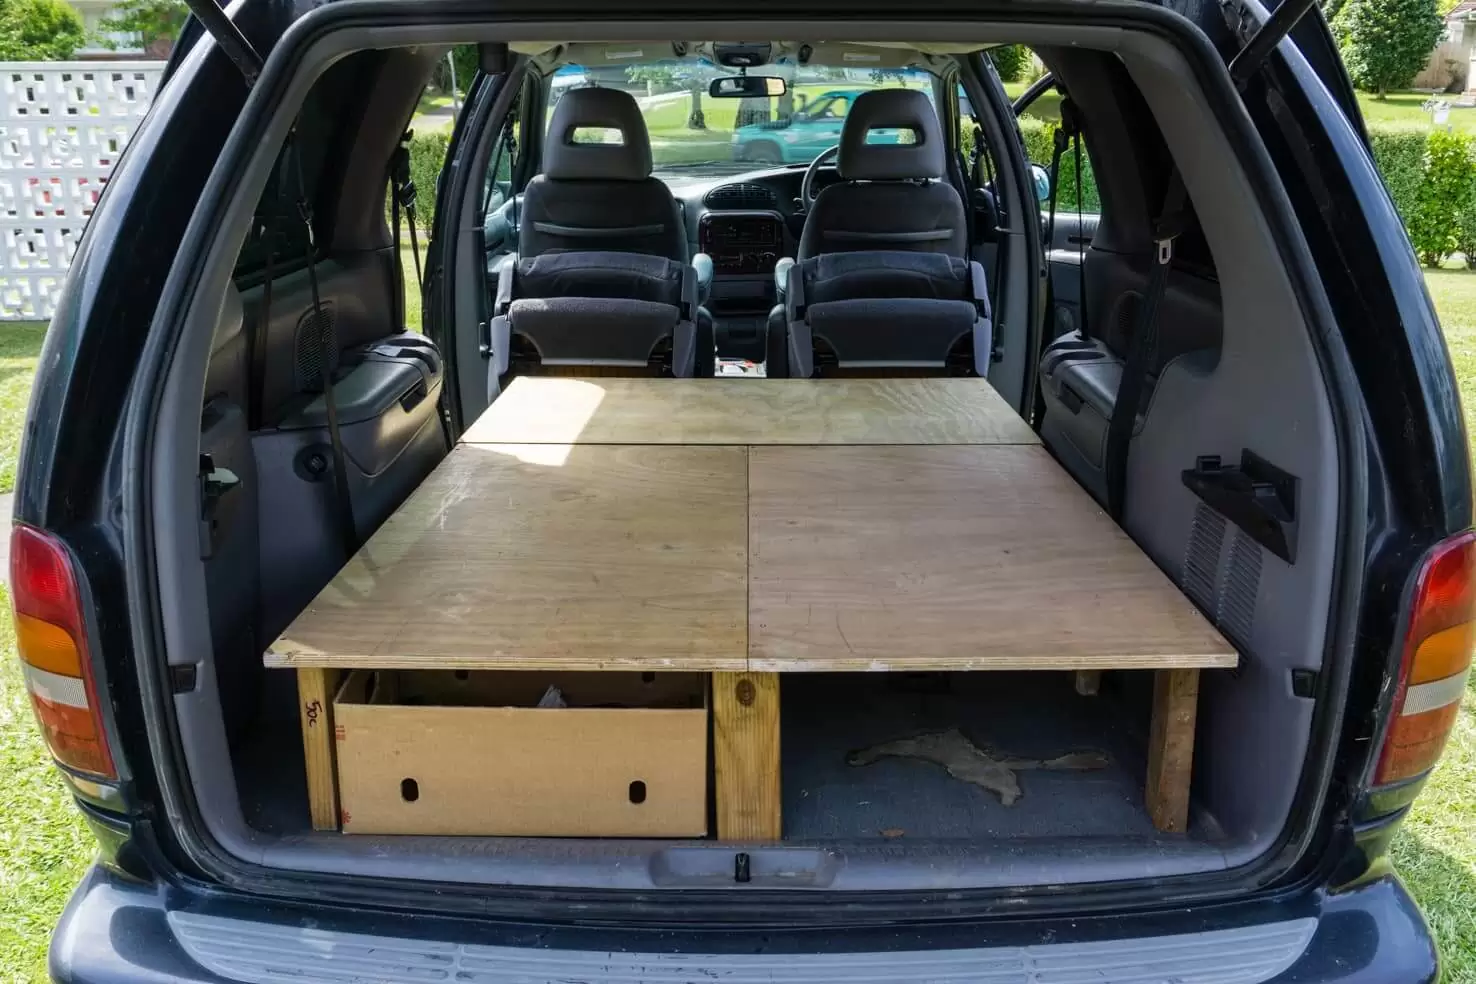
Once the bed was set we fitted the mattress. We cut 4” off along the side as the mattress was too big. Instead of wedging it in, we cut it. Structure of properly fitted mattress is better than wedged and squished mattress with bows and bubbles.

For storage, we used 4 banana boxes from supermarket which slided nicely under the bed. For our bikes, we bought second-hand roof racks. They were only 60 NZD and we didn’t include it in the budget. Also, the top of the bed was used for storage of suitcases of our extra passengers.
Kitchen and shower in a campervan
You can find many nice pictures of kitchens inside minivan campers online but we decided to abandon this idea completely for two reasons:
- It would be absolutely impractical to have extra furniture inside our campervan as it could take almost 20% of our available space. (Doable in a minivan used by two people)
- Have you ever tried to cook something in such tiny and exposed space? We didn’t plan to roast chicken or steaks with mushrooms sauce and baked potatoes. These dishes are better cooked at home or order in the restaurant. And for cooking pasta or boil water for our breakfast oatmeal or tea, our small camper stove with one pot was sufficient. The only drawback of not having any kitchen is the constant stowing and hiding utensils in the boxes.
Shower for obvious reasons can be only built in a proper recreational vehicle. Most common places where we showered were campsites, hostels or public swimming pools. Sometimes we used beach showers but most of the time you cannot use soap or shampoo. For morning hygiene we used water bottles.

To fold the bed you need two people to raise the sliding piece by 1″ up, out of the bolds (pins) and slide it backwards. Then you can unfold chairs and bend the mattress. Now you are set for driving.
Window shades and mosquito nets in our minivan camper
The older version of Chrysler and Dodge minivans have windows at back seats fixed so you cannot open them. They also have small vent windows in the back which you can use during hot nights to get some fresh air in the car. We wanted to use them and therefore we had to fix our mosquito screens. Once we installed them and the car warmed up all tape came loose and we had to fix them with duct tape. No tape has sufficient adhesives during hot summer weather.
Our minivan had tinted rear windows so we didn’t use any extra shades/drapes inside. Using extra drapes will help you keep inside temperature higher which you don’t want in summer.
Troubleshooting
One of the problems you can encounter is that the floor is not fully flat and your bed legs may stick out and lift corners of the bed. I was struggling with thicker or worn out floor carpet but as it turned out you won’t notice half inch differences on your sleep as long as the bed sits on most legs and doesn’t make any noises.

Other concern is that your bed might not be in level from front to back. Your minivan will sit lower with heavier load or higher with a lighter load. Also, campgrounds or parking lots where you will stay overnight are not as flat as you imagine, therefore you don’t need a level for your bed construction. Guesstimating your bed would be sufficient.

Once you completely remove chairs you can start thinking about kitchen or any other ideas how to use extra space 🙂
Things that we recommend and will also buy for long-term use of our next minivan camper:
- Battery source – either extra car battery, lion battery that can be charged during driving
- Fridge – small fridge connected to an independent battery or cooler box
- Ceiling lamp independent of power source – small soft material camping lamp
Hope this article helps you to build your own minivan converted into a campervan.
Read more:
Western Canada road trip from Calgary to Vancouver
32 outdoor things to do on Vancouver Island road trip
Road trip guide to Carretera Austral in Chile
Biking the Going to the Sun Road in Glacier national park, Montana
Leave us a comment or any questions you have about your minivan conversion
Spread the word! PIN this to your Pinterest board.


Do you have photos of the bed frame I see reference to them. This build looks perfect for what we are trying to do and I would love some guidance. Thank you for sharing!
Hey Mike, we’ve added pictures and hope they will be helpful for you. And when you finish, enjoy your trip 🙂
How long are the legs on the. Bed, thanks
I have been looking for both a pickup bed (8′ long) and our DGC mini-van, a solution similar to what you have assembled. Until now, I’d been considering a product called Decked, and another variation, CargoGlider (albeit with a plywood shell similar to yours, over it).
I’m now working on yet another variation that may fit my needs better than either. Essentially I’d be creating a 6′ long, four foot wide base. The back four foot would be for two 4′ long drawers, the front two foot would be for drawers I’d access from the side drawers. I would have base supports along four foot of the back four foot, which would end with a four foot wide support from side to side.
Instead of 2×4/4×4 supports, I intend to use two 4’x8′ sheets of plywood, one (3/4″ maybe) to be used intact as a 4′ x 6′ bed base, with remnants providing 1′ x 4′ supports (‘latitudinally’). The second sheet (3/8″ maybe) to be used as 4’x6′ bottom, with the two remaining 1′ x 4′ as supports for the front (one ending the 6′ front end, the other as the 4′ middle section support.
If I haven’t led you astray with my verbosity, this would result in four drawers (two front 2′ x 2′ drawer, two back 2′ x 4′ drawer spaces). Nothing I need to store is more than 4′ long (camping equipment such as folding table, Coleman Stove, wash basins, cookware, etc., and the two side drawers will probably fall to miscellaneous items, for easy access from side doors (valuables such as cameras, binoculars, laser hypsometers (I’m big tree hunter, measures tree height),etc.).
I like your bedding solution, although I suspect I will have a hard time finding the cover for the 4′ x 6′ x 4″ foam mattress.
Also am trying to figure out mosquito netting solution both for side window vents (ours is a 2001 DGC SE), and rear opening (roughly 4′ x 4′)…thinking strips of velcro for now…
What is the open front 2′ for? Mason, our chocolate labrador retriever traveling companion!
-Don
Hi Don,
Your idea with the cargoglider looks good. It’s useful if you have a lot of things to store.
When you do your mosquito netting try to use heat resistant glue. We used velcro tapes but the glue in the heat that is in the car on sunny day (could be 60 C) gets destroyed and netting falls down.
2′ space in front was used for two more passengers that were travelling with us for a couple of weeks, but definitelly great place for Mason. 🙂
Michal-
I’m in the process of designing the kitchen, although it will be outside of can when in use. Mounting stove, coolers and sinks in a semi-permanent manner to the cargo glide (which can slide out sufficient to access them from sides. For inclement weather, I will be using three pieces of rolled up tarpaulin, each attached to the lift gate, to be unrolled in the event of inclement weather, attached to each other when desirable for access or ventilation. I am still working on a portable, easily cleanable, and quick drying to stand on while cooking, cleaning.
Problems with design? Haven’t worked out means of keeping roof run-off from invading kitchen at lift gate attachment to roof.
Latest revision? There are a number of covered tri-fold 24″ by 72″ by 4″ mattress suppliers which fold neatly to 24″ x 24″ x 24″ cubes when in traveling mode, or for space needs. Some use an inch of memory foam for comfort. A couple of 4″ x 8″ x 40″ foam pieces will augment width between the sliding doors, permitting greater space/comfort along sides of the tri-fold.
Hello fellow van owners, I have purchased a 2010 Grand Caravan SE with Stow and Go seating and I would like to build a conversion utilizing the space best as possible, figured with 10 years producing the same vehicle same dimensions hundreds of thousands if not millions of these vans have been converted some using AutoCAD. Hoping to get my hands on an AutoCAD design specifically to save me from doing dimensions ground up, any drawings, concepts, materials concepts or suggestions that may help my build I would greatly appreciate. Thanks & happy travels.
I got a bunch of clear LED Christmas lights that run off battery or solar on after Christmas clearance that I use for lighting in my minivan
That’s a great idea! We now do the same.
Hey! I’m trying to do a similar one to yours but I want to make the lega a little taller to fit my surfboards, do you have problem with stability on the bes? And if so how did you fix it?
By the way amazing job,
Thanks
We did not have any issues with stability.
This is such a great idea! I love the concept of converting the Chrysler Grand Voyager/Dodge Grand Caravan into a camper. It opens up so many possibilities for road trips and adventures. The practicality and space of the minivan make it such a versatile option. Thanks for sharing these tips and inspiration! I can’t wait to start my own conversion project!
Great post! I’ve been considering converting my Grand Caravan into a camper, and your tips on maximizing space and functionality are super helpful. Love the idea of adding a kitchen setup! Any recommendations on lightweight camping gear to fit in? Thanks for sharing!
What a fantastic guide on converting the Chrysler Grand Voyager/Dodge Grand Caravan into a camper! I love how you outlined each step so clearly. I’m excited to try this out myself. Any tips on optimizing space for storage would be appreciated!
This camper conversion idea for the Chrysler Grand Voyager/Dodge Grand Caravan is fantastic! I love how versatile these minivans are for road trips and weekend getaways. The step-by-step guide makes it seem so doable. Can’t wait to try some of these tips out on my own van!
What a fantastic guide! I’ve been considering converting my Grand Caravan into a camper for weekend getaways, and your tips on space optimization and essential gear are super helpful. I can’t wait to get started on the project!
Great post! I love the detailed tips on converting the Chrysler Grand Voyager into a camper. The layout suggestions are super helpful, and I can’t wait to try out some of these ideas for my own road trips. Thanks for sharing your insights!
What a fantastic guide on converting the Chrysler Grand Voyager/Dodge Grand Caravan into a camper! I never thought about using a minivan for camping, but your tips and suggestions are super helpful. I especially love the idea of maximizing the storage space! Can’t wait to try this out for my next road trip!